
Importing CSV files
A guide how to quickly import many items into your dashboard.
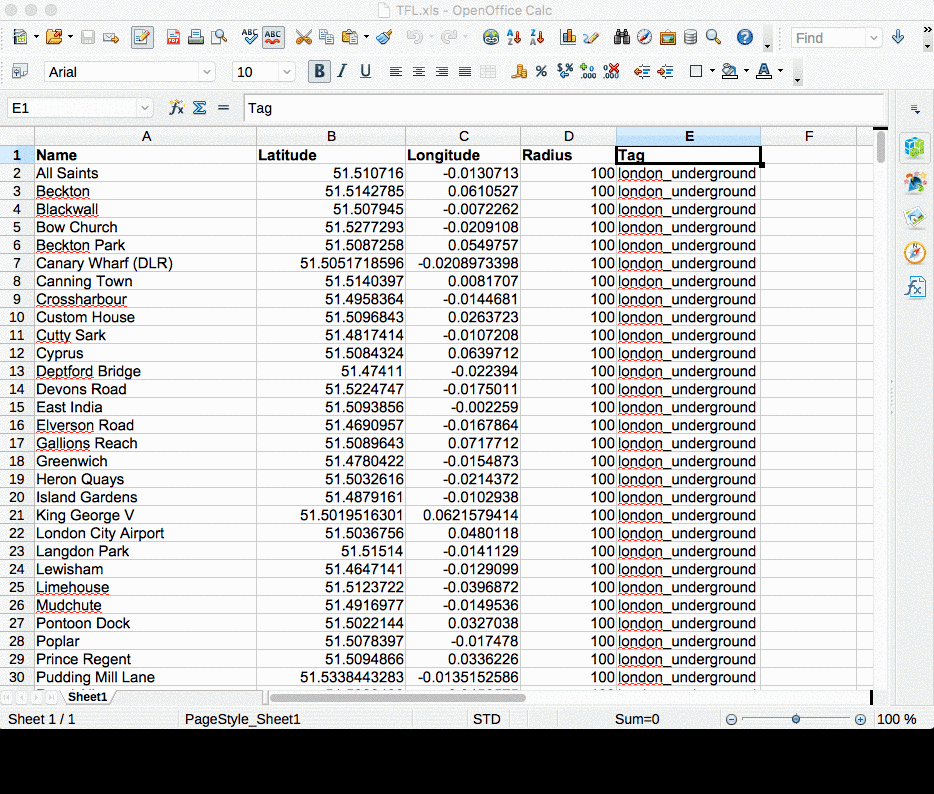
It can be quite cumbersome to import large amounts of items into your dashboard. For example, say you need a to create a geotargeting tag for all London underground stations.
Often times companies keep a list of places as spreadsheets, for example Excel files. These can easily be converted into CSV and imported into the dashboard.
The format is pretty flexible as will be demonstrated below.
1. First Step - Create a CSV file
Save your spreadsheet as CSV.
1. Navigate to the import page
First you need to login. Then press Settings > Import


3. Select what you wish to import
Here you can import lists of beacons, geofences, geotargeting areas or retargeting audiences.
In this example we're going to import Geotargeting areas.

4. Select your CSV

5. Select which columns correspond to what
This step is a bit finicky. For the Glimr importer to know what data each column corresponds to you need to select them.
The sample file included headers that were there from the spreadsheet, making it easy to map.


Make sure to fill in each box below. Rows that do not mean anything should be marked as Ignore.

5. Select rows
Files may contain rows that you do not wish to import. In our example below for example the header row is not a valid geotargeting area.
Check the checkboxes to the right for each row you want imported.

Deselect rows that should be ignored.

6. Preview and upload
Just give your data a quick eye over to make sure it looks like intended.

Aaaand wait. It may take a while, and any page reload during the time will cause inconsistent results.

Updated about 1 year ago